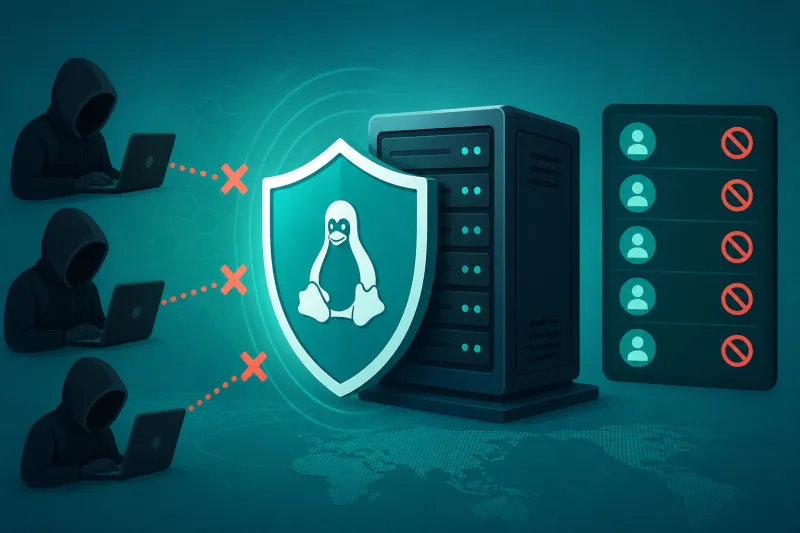
Fail2Ban Guide: Stop Brute-Force Attacks
Table of Contents
Internet-facing SSH on a VPS attracts constant credential stuffing. Even with password authentication disabled, the noise fills logs and wastes a little CPU. Fail2Ban watches auth logs for repeated failures and updates firewall rules to ban offending addresses for a time—simple, effective, and well-supported on Ubuntu.
This guide installs and configures Fail2Ban on Ubuntu 22.04/24.04 for SSH brute-force defense, explains jails and filters, tunes ban timers, whitelists your admin IP, and shows how Fail2Ban works alongside UFW on a VPN host. It is complementary to key-only SSH, not a replacement.
Before enabling aggressive bans, add your office or home IP to ignoreip so you do not ban yourself while testing.
What You'll Learn
- How Fail2Ban jails, filters, and actions fit together
- How to install and enable an SSH jail on Ubuntu
- How to tune
maxretry,findtime, andbantime - How to whitelist trusted IPs and check ban status
- How Fail2Ban interacts with UFW/nftables
- What Fail2Ban does not protect you from
How Fail2Ban Works
- A filter defines regexes that match log lines (for example, failed SSH logins)
- A jail binds a filter to a service/port, thresholds, and an action
- An action inserts a firewall ban (commonly via nftables/iptables or a UFW helper)
- After
bantime, the ban expires unless you configure permanent bans
Fail2Ban is reactive. It does not patch SSH. It raises the cost of repeated failures from a single source address.
Install Fail2Ban
sudo apt update
sudo apt install -y fail2ban
sudo systemctl enable --now fail2ban
systemctl status fail2ban --no-pager
Do not edit /etc/fail2ban/jail.conf directly—package upgrades overwrite it. Use jail.local and jail.d/*.local.
sudo cp /etc/fail2ban/jail.conf /etc/fail2ban/jail.local
Prefer small overrides in /etc/fail2ban/jail.d/ for clarity.
Enable the SSH Jail
Create /etc/fail2ban/jail.d/sshd.local:
[sshd]
enabled = true
port = ssh
filter = sshd
backend = systemd
maxretry = 5
findtime = 10m
bantime = 1h
ignoreip = 127.0.0.1/8 ::1 203.0.113.10
Replace 203.0.113.10 with your real admin IP (add more addresses separated by spaces).
On Ubuntu with journald, backend = systemd is often the right choice so Fail2Ban reads SSH logs from the journal. If your install defaults to file backend and works, keep what fail2ban-client status proves is healthy.
Reload:
sudo systemctl restart fail2ban
sudo fail2ban-client status
sudo fail2ban-client status sshd
You should see the sshd jail listed with currently banned IPs (likely empty at first).
Understand the Tuning Knobs
| Setting | Meaning |
|---|---|
maxretry |
Failures within findtime before ban |
findtime |
Rolling window for counting failures |
bantime |
How long the ban lasts |
ignoreip |
Never ban these sources |
Example stricter policy for a key-only host that still wants quiet logs:
maxretry = 3
findtime = 5m
bantime = 12h
Example gentler policy while you still use passwords during a migration (finish migrating off passwords):
maxretry = 8
findtime = 15m
bantime = 30m
Permanent bans (bantime = -1) are possible but operationally sharp—use with reliable ignoreip and monitoring.
Whitelist Carefully
Always include:
127.0.0.1/8and::1- Your stable admin IPs
- Monitoring systems that probe SSH if they generate failed auths (better: fix the probes)
If you roam on DHCP broadband, either update ignoreip when it changes, or rely on key-only auth and accept occasional self-care unbans via provider console—not ideal. A small jump host with a stable IP is cleaner for teams.
Ban and Unban Manually
sudo fail2ban-client set sshd banip 198.51.100.66
sudo fail2ban-client set sshd unbanip 198.51.100.66
sudo fail2ban-client status sshd
Useful when a CI runner or colleague gets banned accidentally.
Recidive Jail (Optional)
Fail2Ban ships ideas for banning addresses that return repeatedly. A recidive jail watches Fail2Ban’s own logs for repeat offenders and applies longer bans. Enable only after the primary sshd jail is stable and you understand the filter—misconfiguration can amplify mistakes.
Actions and UFW
Default actions typically add nftables/iptables drop rules. On Ubuntu you can configure jails to use UFW:
[sshd]
enabled = true
banaction = ufw
Whether you use UFW actions or nftables actions, keep a coherent story:
- UFW default deny already blocks unsolicited ports
- Fail2Ban bans active attackers hitting open ports (SSH)
Cloud Firewalls (DigitalOcean) sit upstream; Fail2Ban still helps for traffic that reaches the host. Fail2Ban cannot insert rules into DigitalOcean Cloud Firewalls—it works on the instance.
Filters: When Defaults Are Enough
The stock sshd filter matches common OpenSSH failure lines. Custom filters belong in /etc/fail2ban/filter.d/. Do not invent regexes casually—test with:
sudo fail2ban-regex systemd-journal /etc/fail2ban/filter.d/sshd.conf
Or against a log file if you use file backend. False positives ban legitimate users; false negatives leave you exposed to noise.
Other Jails on a VPN VPS
For a host that only runs SSH + WireGuard, sshd is the main jail. WireGuard does not present a password prompt on UDP 51820—brute force looks different (mostly noise packets). Fail2Ban is the wrong tool for raw UDP flood mitigation; use cloud firewall rate controls, provider DDoS guidance, or network-level protections.
If you later expose HTTP(S), consider jails for web auth abuse carefully—application rate limiting is often better.
Logging and Notification
Check Fail2Ban logs:
sudo journalctl -u fail2ban -n 50 --no-pager
sudo tail -n 50 /var/log/fail2ban.log
Optional email actions exist but require a working MTA. Many operators skip email and scrape fail2ban-client status from monitoring instead.
Testing Without Locking Yourself Out
- Set
ignoreipto your current IP - From a different IP (another VPS or phone hotspot), attempt failed SSH logins past
maxretry - Confirm the test IP appears in
fail2ban-client status sshd - Confirm SSH from the banned IP fails, and from
ignoreipstill works - Unban the test IP
Never test by deliberately failing auth from your only admin IP without ignoreip.
Integration With SSH Hardening
Recommended stack:
- ed25519 keys,
PasswordAuthentication no - UFW + cloud firewall allowlists when possible
- Fail2Ban
sshdjail for residual noise and misconfig safety PermitRootLogin noandAllowUsers
Fail2Ban shines when something reintroduces passwords or when scanners hammer unfinished hosts during bootstrap.
Default Ignore Lists and Cloud Metadata Gotchas
Some environments need extra ignoreip entries for:
- Your monitoring vendor’s probe addresses
- A CI runner that SSHs with short-lived keys (prefer success-only automation so it never fails auth)
- The provider’s internal health checks if they ever touch SSH (uncommon)
Do not broadly ignore entire cloud provider IP ranges—that defeats the purpose. Be specific.
If you change your home IP often, maintain a tiny script you run after ISP renumbering:
sudo sed -i 's/^ignoreip = .*/ignoreip = 127.0.0.1\/8 ::1 NEW.IP.HERE/' /etc/fail2ban/jail.d/sshd.local
sudo systemctl restart fail2ban
Better long-term: stable admin path via WireGuard, then SSH only from 10.66.66.0/24 and ignore that subnet.
Reading Ban Statistics
sudo fail2ban-client status sshd
sudo fail2ban-client get sshd banip
sudo fail2ban-client get sshd findtime
sudo fail2ban-client get sshd bantime
Watch for “currently banned” climbing without bound during an incident—that can mean a distributed source list or a filter matching too broadly. Correlate with:
sudo journalctl -u ssh --since '1 hour ago' | tail -n 100
If you see successful logins from unknown IPs, escalate beyond Fail2Ban: rotate keys, review authorized_keys, and consider the host compromised until proven otherwise.
Performance and Resource Use
Fail2Ban is lightweight on a 1 GB Droplet. Pathological cases are huge log rates and expensive custom regexes. Stick to packaged filters for SSH. If journal growth is an issue, configure journald retention—not by disabling auth logging.
Coordinating With Cloud Firewalls
Example defense layers for SSH:
- DigitalOcean Cloud Firewall: allow TCP 22 only from admin CIDRs
- UFW: same policy on-host
- Fail2Ban: ban stragglers that still reach sshd (compromised admin network path, temporary rule mistakes)
When Cloud Firewall already allowlists a single /32, Fail2Ban may rarely ban anyone—and that is fine. Keep it enabled for the day someone opens SSH to the world “just for a minute.”
Upgrades
After apt upgrade updates Fail2Ban, confirm jails are still enabled:
sudo fail2ban-client status
If a major version changes defaults, re-check backend and banaction. Your jail.d overrides should survive; custom edits to packaged files will not.
Best Practices
- Configure via
jail.d/*.local, not by rewriting packagedjail.conf - Always set
ignoreipfor admin and monitoring sources - Start with moderate
bantime; escalate once confident - Restart/reload Fail2Ban after changes and verify
status sshd - Keep system time correct—log timestamps matter
- Document unban procedure for teammates
- Pair with key-only SSH; do not treat Fail2Ban as permission to keep passwords
Common Mistakes
- Editing
jail.confand losing changes on upgrade - No
ignoreip, then banning yourself - Assuming Fail2Ban blocks attackers at the DigitalOcean Cloud Firewall layer
- Enabling many jails with untested filters
bantime = -1without operational unban habits- Ignoring Fail2Ban while SSH still allows passwords
- Forgetting to restart after config changes
- Expecting Fail2Ban to stop WireGuard UDP scans
FAQ
Does Fail2Ban help if passwords are already disabled?
Yes—less critical, still useful. It reduces log spam and protects you if password auth is re-enabled by mistake. Key-only auth remains the primary control.
Fail2Ban vs ufw limit?
ufw limit rate-limits new connections. Fail2Ban bans based on authenticated failure patterns in logs. Using both is reasonable; they are not identical.
Why is the jail not banning anyone?
Check backend matches how SSH logs (systemd vs file), confirm filter matches with fail2ban-regex, confirm enabled = true, and ensure attackers are actually hitting this host. Also verify you are not testing from ignoreip.
Can I ban entire /24 networks?
Possible via actions and custom configuration, but easy to over-ban shared NATs (mobile carriers, corporate egress). Prefer single IP bans unless you have a clear abuse pattern.
Does Fail2Ban replace crowdsec or WAF products?
No. Fail2Ban is a classic host local control. CrowdSec and WAFs address different scopes. For a single Ubuntu VPN VPS, Fail2Ban + UFW + hard SSH is a solid baseline.
How do I stop Fail2Ban?
sudo systemctl disable --now fail2ban
Remove residual bans per your banaction (reboot clears many nftables sets depending on setup—verify explicitly).
Summary
Fail2Ban stops repeated SSH abuse by matching auth failures and temporarily firewalling source IPs. On Ubuntu, install the package, enable an sshd jail in jail.d, set sensible retries and ban times, whitelist your admin IPs, and verify with fail2ban-client status. Use it with key-only SSH and UFW—not instead of them.
Quiet auth logs and fewer pointless sessions are the operational win. The security win is defense in depth when something goes wrong.
If you want to automate VPN server deployment instead of configuring everything manually, TunnelFleet helps you provision and manage VPN infrastructure on your own cloud provider with minimal manual setup.
Share this article
Practical guides on VPN infrastructure, server automation, and self-hosted networking from the TunnelFleet team.
View all articles by TunnelFleet Editorial →