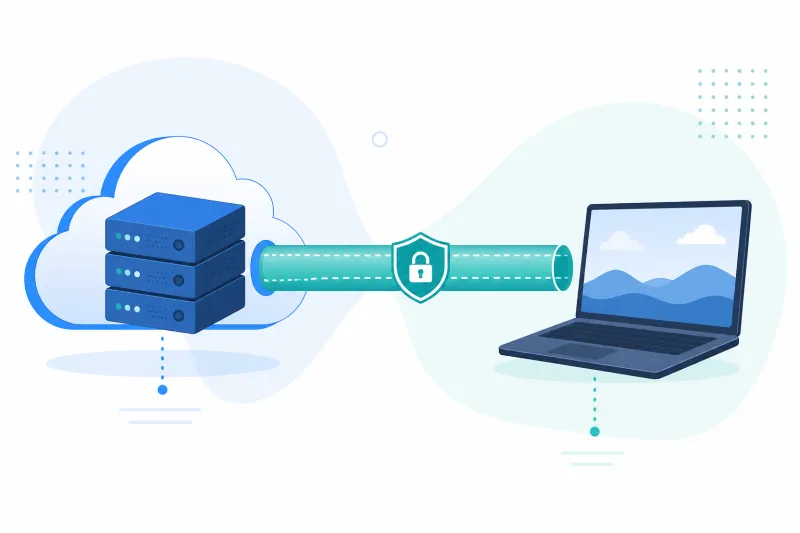
Deploy WireGuard on DigitalOcean
Table of Contents
Deploying WireGuard on DigitalOcean is one of the fastest ways to get a self-hosted VPN endpoint with a public IP, predictable networking, and an Ubuntu LTS base you already know how to operate. You create a Droplet, lock down SSH, install WireGuard, open a single UDP port, and add peers.
This guide walks through a production-minded baseline on Ubuntu 22.04 or 24.04 LTS. It assumes you control the DigitalOcean account, can create Droplets, and are comfortable with the shell. DigitalOcean is the cloud provider we use throughout—TunnelFleet’s managed provisioning path targets DigitalOcean as well.
You will end with a reachable WireGuard interface, IP forwarding for client traffic, firewall rules that do not lock you out, and a client config you can import into official WireGuard apps.
What You'll Learn
- How to size and create a DigitalOcean Droplet for WireGuard
- How to secure first-login access before exposing a VPN
- How to install WireGuard and generate server keys on Ubuntu
- How to configure
wg0, enable forwarding, and open UDP in UFW and DigitalOcean Cloud Firewalls - How to add a client peer and verify the handshake
- Operational habits that keep a single Droplet reliable
Prerequisites
- A DigitalOcean account with permission to create Droplets
- An SSH key already uploaded to DigitalOcean (Settings → Security)
- A domain name is optional but useful for a stable endpoint hostname
- Local WireGuard client software for your laptop or phone
Choose Droplet Size and Region
WireGuard is CPU-light for small teams. Start with:
- Image: Ubuntu 24.04 LTS (or 22.04 LTS)
- Plan: Basic Droplet, 1 vCPU / 1 GB RAM is enough for dozens of light peers
- Disk: default SSD is fine; WireGuard itself barely uses disk
- Region: closest to your users, or the region where you need egress IP reputation
If you expect heavy throughput (many concurrent full-tunnel users, large file transfers), move up to 2 vCPU. Memory is rarely the bottleneck; packet rate and bandwidth are.
Create the Droplet with your SSH key selected. Do not rely on password authentication for root. Note the public IPv4 address from the Droplet overview. Enable IPv6 at creation time if you want dual-stack later—it is harder to retrofit cleanly if you skip it now.
First Login and Baseline Hardening
SSH in as root (or the default user, depending on image):
ssh root@YOUR_DROPLET_IP
Update packages immediately:
apt update && apt upgrade -y
Create a non-root sudo user if you have not already:
adduser deploy
usermod -aG sudo deploy
rsync --archive --chown=deploy:deploy ~/.ssh /home/deploy
Log out and reconnect as deploy. Confirm sudo works, then disable password authentication and root login in /etc/ssh/sshd_config (or a drop-in under /etc/ssh/sshd_config.d/) once key auth is verified. Reload SSH only after you have a second session open.
Install UFW and allow SSH before enabling:
sudo apt install -y ufw
sudo ufw allow OpenSSH
sudo ufw enable
sudo ufw status verbose
This order matters. Enabling UFW without an SSH allow rule is a common lockout.
Install WireGuard
On Ubuntu 22.04 and 24.04, WireGuard is in the default repositories:
sudo apt install -y wireguard
Confirm the module loads:
sudo modprobe wireguard
lsmod | grep wireguard
Create the configuration directory permissions baseline:
sudo mkdir -p /etc/wireguard
sudo chmod 700 /etc/wireguard
Generate server keys:
cd /etc/wireguard
umask 077
wg genkey | tee server_private.key | wg pubkey > server_public.key
Keep server_private.key on the server only. You will distribute the public key to clients.
Plan Addresses
Pick a private tunnel subnet that does not collide with office Wi‑Fi or Docker networks. A common choice:
- Tunnel network:
10.66.66.0/24 - Server:
10.66.66.1/24 - First client:
10.66.66.2/32
Document the allocation. Spreadsheet or inventory file beats memory after the third peer.
Create the Server Config
Create /etc/wireguard/wg0.conf:
[Interface]
Address = 10.66.66.1/24
ListenPort = 51820
PrivateKey = SERVER_PRIVATE_KEY_HERE
PostUp = sysctl -w net.ipv4.ip_forward=1
PostUp = iptables -t nat -A POSTROUTING -o eth0 -j MASQUERADE
PostDown = iptables -t nat -D POSTROUTING -o eth0 -j MASQUERADE

# [Peer] blocks added below
Replace the private key with the contents of server_private.key. On DigitalOcean Ubuntu images the primary interface is usually eth0; confirm with ip -br link.
For persistence of forwarding across boots, also set:
echo 'net.ipv4.ip_forward=1' | sudo tee /etc/sysctl.d/99-wireguard-forward.conf
sudo sysctl --system
If you use IPv6 for client traffic, add net.ipv6.conf.all.forwarding=1 and matching ip6tables NAT or routing rules. Start with IPv4 until the tunnel works.
Open UDP 51820
UFW on the Droplet
sudo ufw allow 51820/udp comment 'WireGuard'
sudo ufw status numbered
DigitalOcean Cloud Firewall (recommended)
In the DigitalOcean control panel, create a Cloud Firewall attached to this Droplet:
- Inbound: TCP 22 from your admin IPs (optional but strong); UDP 51820 from
0.0.0.0/0(and::/0if IPv6); deny everything else by default - Outbound: allow as needed (typically allow all for a VPN egress node)
Cloud Firewalls sit in front of the Droplet. Opening UFW alone is not enough if a Cloud Firewall still blocks UDP 51820. Opening Cloud Firewall alone while UFW defaults to deny also fails. Keep them aligned.
Enable and Start WireGuard
sudo systemctl enable --now wg-quick@wg0
sudo wg show
ip -br addr show wg0
You should see the interface up with 10.66.66.1 and a listening port of 51820.
Add Your First Client Peer
On the server, generate a client keypair (or generate on the client and only copy the public key to the server—better for private key hygiene):
wg genkey | tee client1_private.key | wg pubkey > client1_public.key
Append a peer to /etc/wireguard/wg0.conf:
[Peer]
PublicKey = CLIENT1_PUBLIC_KEY
AllowedIPs = 10.66.66.2/32
Reload without downtime:
sudo wg syncconf wg0 <(wg-quick strip wg0)
# or:
sudo systemctl reload wg-quick@wg0
Client config example (client1.conf):
[Interface]
PrivateKey = CLIENT1_PRIVATE_KEY
Address = 10.66.66.2/32
DNS = 1.1.1.1

[Peer]
PublicKey = SERVER_PUBLIC_KEY
Endpoint = YOUR_DROPLET_IP:51820
AllowedIPs = 0.0.0.0/0
PersistentKeepalive = 25
AllowedIPs = 0.0.0.0/0 is full-tunnel. For split tunnel to the VPN LAN only, use 10.66.66.0/24. PersistentKeepalive = 25 helps clients behind NAT keep the mapping alive toward the Droplet.
Import the client config into the WireGuard app and activate. On the server:
sudo wg show
Look for a recent handshake and non-zero transfer counters.
Verify Connectivity
From the client:
ping -c 3 10.66.66.1
curl -4 ifconfig.me
If full-tunnel is configured, ifconfig.me should show the Droplet’s public IP. If ping works but egress does not, check forwarding, MASQUERADE interface name, and UFW forwarding policy.
Enable UFW forwarding if needed:
sudo sed -i 's/DEFAULT_FORWARD_POLICY="DROP"/DEFAULT_FORWARD_POLICY="ACCEPT"/' /etc/default/ufw
sudo ufw reload
Some setups prefer explicit UFW route rules instead of a blanket ACCEPT; start simple, then tighten.
Optional: Hostname Endpoint
Create an A record such as vpn.example.com pointing at the Droplet IP. Put that hostname in client Endpoint= lines. When you rebuild a Droplet, update DNS instead of redistributing every config—if you keep the same keys and tunnel addressing.
Operational Notes Specific to DigitalOcean
- Floating IPs: useful if you rebuild Droplets often; point clients at the Floating IP or DNS that follows it
- Snapshots: fine for disaster recovery; treat private keys in snapshots as sensitive
- Monitoring: watch bandwidth graphs; unexpected spikes can mean a misconfigured peer or abuse of an egress VPN
- Regions: place Droplets near users; WireGuard latency is mostly path RTT, not protocol overhead
Best Practices
- Generate client private keys on the client device when possible; only store public keys on the server
- Use unique
/32addresses per peer and never reuse keys after revocation - Prefer DNS or Floating IP for endpoints so rebuilds do not require mass client updates
- Keep Cloud Firewall and UFW rules synchronized for UDP 51820 and SSH
- Document peer inventory: name, public key, tunnel IP, owner, created date
- Restrict SSH to your admin IPs via Cloud Firewall when your work pattern allows it
- Enable unattended security updates for the Ubuntu base (
unattended-upgrades) - Test a peer revoke: remove
[Peer], reload, confirm handshake stops
Common Mistakes
- Opening only UFW or only Cloud Firewall — both layers must allow UDP 51820
- Wrong MASQUERADE interface — NAT on
eth1while traffic leaveseth0breaks egress - Colliding tunnel subnets —
10.0.0.0/24often fights home routers; pick something distinctive - Forgetting IP forwarding — handshake succeeds, internet egress fails
- Full-tunnel without DNS — clients lose name resolution; set
DNS=in client config - Editing live keys in chat or email — treat private keys like production secrets
- Password SSH left enabled — your VPN Droplet will be scanned constantly on port 22
FAQ
How many WireGuard peers can one Droplet handle?
For light remote-access peers, a 1 GB Basic Droplet is usually fine into the tens of users. Scale CPU and bandwidth before you worry about WireGuard’s cryptographic limits. Operational inventory becomes the real constraint first.
Do I need a DigitalOcean Load Balancer?
Not for a single WireGuard UDP endpoint. Load balancers are aimed at HTTP/TCP application traffic. Keep WireGuard on the Droplet’s public IP (or Floating IP).
Can I run WireGuard and OpenVPN on the same Droplet?
Yes, on different ports. Keep firewall rules explicit and watch CPU if both terminate many clients. Prefer one protocol per role when you can.
Should I use DigitalOcean’s VPC?
VPC networking helps private Droplet-to-Droplet traffic. Your WireGuard UDP listener still needs a public path for internet clients. Use VPC when you have multiple backend Droplets; do not expect VPC alone to replace the VPN.
What if the handshake never appears?
Check UDP 51820 on both UFW and Cloud Firewall, confirm Endpoint IP/port, confirm public keys are not swapped, and verify the client’s AllowedIPs does not blackhole its own path to the server. tcpdump -ni eth0 udp port 51820 on the Droplet shows whether packets arrive.
Is DigitalOcean the only provider TunnelFleet supports?
TunnelFleet currently provisions and manages VPN infrastructure on DigitalOcean. This guide’s Droplet steps match that model; do not assume other clouds are available in-product today.
Summary
Deploying WireGuard on DigitalOcean is a short path: Ubuntu Droplet, SSH hardening, WireGuard package, wg0 with forwarding and NAT, UDP 51820 open in UFW and Cloud Firewall, then peer configs with clear AllowedIPs. Verify with wg show, ping the tunnel IP, and confirm egress IP when using full tunnel.
Keep keys out of chat, keep firewall layers aligned, and treat peer inventory as part of the system—not an afterthought.
If you want to automate VPN server deployment instead of configuring everything manually, TunnelFleet helps you provision and manage VPN infrastructure on your own cloud provider with minimal manual setup.
Share this article
Practical guides on VPN infrastructure, server automation, and self-hosted networking from the TunnelFleet team.
View all articles by TunnelFleet Editorial →